Guide
Adam and Eve Boss Guide
Adam and Eve should be treated as a coordination and shared-space check. The safest plan is to preserve recovery lanes, avoid crowding allies, and choose a role you can execute while tracking the wider fight.
Last reviewed: June 29, 2026
Short Answer
Against Adam and Eve, do not play like it is a solo damage race. Keep space for allies, watch recovery windows, avoid unsafe revives, and use a weapon role that supports group stability.
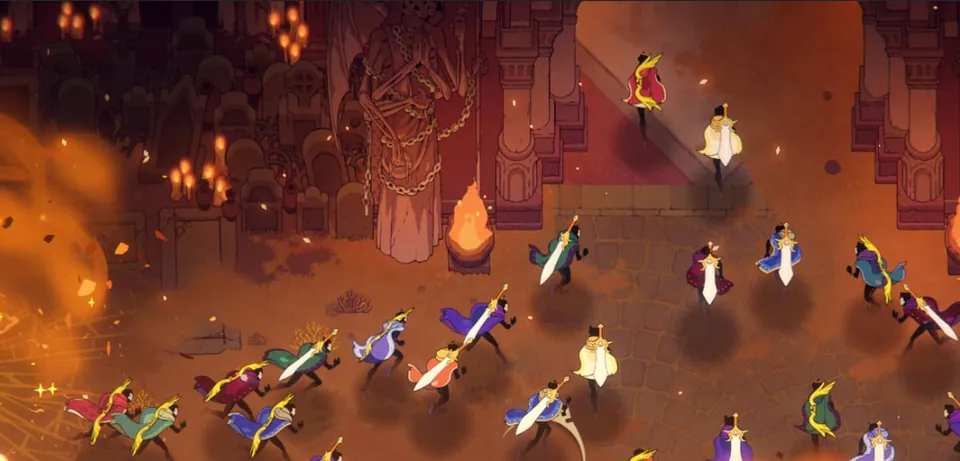
Adam and Eve Fight Priorities
Adam and Eve is best approached as a coordination check. The fight asks players to keep track of shared space, revive timing, role execution, and the wider group state. Personal damage matters, but only after the group can stay stable long enough to convert clean windows.
Treat every commitment as a team decision. If your position blocks recovery, drags pressure through allies, or leaves you too far away to help, the damage window was probably not worth it.
| Fight Pressure | Main Risk | Player Action |
|---|---|---|
| Shared space | Players crowding the same recovery lanes and making one danger window affect too many people. | Leave enough room for allies to dodge, reset, and revive without dragging pressure through the group. |
| Split attention | Losing track of the wider fight while focusing only on the target directly in front of you. | Check ally positions and pressure movement before committing to long attacks or risky revives. |
| Recovery timing | Starting revives while the area is unstable and turning one downed player into several. | Wait for a clean recovery window, then help the group stabilize before chasing another damage window. |
| Role confusion | Too many players chasing damage while nobody protects space, recovery, or control. | Play the role your weapon actually supports: pressure, control, support, or safer recovery. |
- Fight Pressure
- Shared space
- Main Risk
- Players crowding the same recovery lanes and making one danger window affect too many people.
- Player Action
- Leave enough room for allies to dodge, reset, and revive without dragging pressure through the group.
- Fight Pressure
- Split attention
- Main Risk
- Losing track of the wider fight while focusing only on the target directly in front of you.
- Player Action
- Check ally positions and pressure movement before committing to long attacks or risky revives.
- Fight Pressure
- Recovery timing
- Main Risk
- Starting revives while the area is unstable and turning one downed player into several.
- Player Action
- Wait for a clean recovery window, then help the group stabilize before chasing another damage window.
- Fight Pressure
- Role confusion
- Main Risk
- Too many players chasing damage while nobody protects space, recovery, or control.
- Player Action
- Play the role your weapon actually supports: pressure, control, support, or safer recovery.
Recommended Weapon Roles
The right weapon is the one that lets you contribute while still tracking allies and recovery lanes. Do not choose a technical role if it makes you ignore the rest of the arena.
| Role | Good Fit | Common Mistake |
|---|---|---|
| Safe ranged pressure | Bow of Hope or another ranged role that can pressure without crowding recovery paths. | Standing so far away that you stop helping with revives and group stabilization. |
| Controlled melee | Sword of Justice or Glaive of Temperance when you can enter, punish, and leave cleanly. | Overcommitting because the first melee window looked safe. |
| Support and control | Staff of Sloth or Scepter of Charity when the group needs safer pacing and setup. | Creating openings where allies cannot reach or use them. |
| Technical damage | Crossbows of Pride or other sharper payoff roles after positioning feels consistent. | Tunnel visioning on damage while the group collapses nearby. |
- Role
- Safe ranged pressure
- Good Fit
- Bow of Hope or another ranged role that can pressure without crowding recovery paths.
- Common Mistake
- Standing so far away that you stop helping with revives and group stabilization.
- Role
- Controlled melee
- Good Fit
- Sword of Justice or Glaive of Temperance when you can enter, punish, and leave cleanly.
- Common Mistake
- Overcommitting because the first melee window looked safe.
- Role
- Support and control
- Good Fit
- Staff of Sloth or Scepter of Charity when the group needs safer pacing and setup.
- Common Mistake
- Creating openings where allies cannot reach or use them.
- Role
- Technical damage
- Good Fit
- Crossbows of Pride or other sharper payoff roles after positioning feels consistent.
- Common Mistake
- Tunnel visioning on damage while the group collapses nearby.
Revive and Recovery Discipline
Recovery is one of the biggest decision points in this fight. A downed player is not always an immediate revive target. If the path is unstable or the group is stacked in danger, the better play is often to create room first.
- Check the lane: revive only when the route in and out is readable.
- Do not stack danger: avoid pulling boss pressure through players who are already recovering.
- Stabilize before greed: after a revive, give the group a moment to reset before forcing damage.
Build Direction
Build for consistency before payoff. If the group fails from unsafe revives or crowded space, a fragile damage setup will not solve the real problem. Add pressure only after survival and recovery feel repeatable.
- If you crowd allies: choose safer range, reach control, or support setup to preserve lanes.
- If revives fail: lean toward recovery, Mercy-style support, or group-value perks.
- If damage is low: improve uptime and target selection before narrowing into glassy payoff.
Keep Reading
Related Reference Pages
Keep Reading
Related Strategy
Keep Reading
Related Guides
FAQ
Frequently Asked Questions
What should I prioritize against Adam and Eve?
Prioritize group space, recovery lanes, safe revives, and role consistency before chasing damage.
Which weapon is best for Adam and Eve?
Use the weapon you can play while tracking the wider fight. Safe ranged pressure, controlled melee, support control, and setup roles can all help when executed consistently.
Why do Adam and Eve attempts collapse?
Attempts often collapse when players crowd each other, force unsafe revives, or focus on personal damage while group recovery fails.
Sources
Source Notes
Last reviewed: June 29, 2026